Thursday, October 28, 2010

Coleslaw with "Creamy" Buttermilk Dressing


Regular readers of this blog (you know who you are, right, Mom?) will likely have discerned that my culinary emphasis is on flavor and creativity in the kitchen first and foremost. Healthfulness certainly comes in third after simplicity, which is also of great importance to me. To my partner of 18 years, however, healthfulness is undoubtedly number one. He exercises like mad and seeks to fuel his body with only things that are "good" for him, whatever that means! Having lived that lifestyle I can respect it, and frankly, many benefits of his dogged exercise regimen accrue to me directly, as many friends of mine who've seen pictures of Brian at the beach note with envy! Although I exercise a lot less nowadays, I believe that through mindful eating and an active lifestyle everything will balance out. I therefore will not categorically eliminate foods from my diet that are deemed unhealthy by the food police. I just (try to) exercise self-control and move towards healthful--and of course flavorful--alternatives.

For that reason my partner and I recently discovered that we enjoy eating vegetarian dinners one or two nights of the four to six dinners we make at home every week. We didn't declare that we want to give up red meat (that means bison in our house anyway, not beef) or anything. We just decided that we wanted to move in a positive direction towards an alternative. Partly this was born of wanting to eat less meat and save a big chunk of our weekly farmers market food bill as it can cost a bit of coin to buy chicken and meat from local producers only. But mostly the idea was born out of trying to ensure that the produce we'd purchased would be used up over the course of the week and there would be nothing lingering over into the next week and cutting into that week's farmers market haul. Even worse would be letting good food go bad for never having gotten around to preparing it. So many recipes, so little time!

Eating what is on hand all goes along with another predominant kitchen ethos of mine to eat down the fridge every week anyway. Most of us go to the market (whether a farmers market or a supermarket) and buy a week's worth of food and stuff it into the fridge, freezer, and pantry. Supermarket shoppers want to avoid going to the dreaded grocery store because it's usually such a hassle, and we farmers market goers usually have one shot a week on the weekend to bring home the week's ingredients for who knows what meal. Then, because we've packed everything into the fridge/freezer/pantry, we can't see or remember what's already been purchased and may end up letting it go bad, having to buy more of what we already had on hand! Eating down the fridge is the only way to combat this tendency, unless you're in the habit of buying on a daily rather than a weekly basis. However, with that approach, I just don't think that food that's been shipped from some central distribution center is going to be as fresh as what you can get at the farmers market, which was most likely picked the day before and will therefore have a longer shelf life in your fridge than what you might buy from the store anyway.

So this week's eating down the fridge challenge was to use up half of a very large head of cabbage whose other half was sauteed and simmered to make a sublime cabbage and rice soup/cabbage risotto for one of last week's vegetarian dinners. I had my favorite coleslaw with apple, fennel, and dill on my mind, but was also wistfully remembering the colesaw I'd had over Labor Day weekend at my sister-in-law's parents' house. She had made a slaw with mayonnaise that perfectly complemented the BEST SMOKED PULLED PORK SANDWICH I'VE EVER TASTED (pardon my shouting but that's how good that sandwich and meal under the stars were that evening)! My own slaw is healthy and vegan and delicious (are those listed in the wrong order?), but her version made with mayonnaise had something to say about what makes for a great coleslaw and I think the Hellman's real mayo was the most vociferous!

Apparently sister-in-law's mayo based slaw was in the recesses of my mind when I was contemplating my half head of cabbage when another foodie friend of mine said that he'd made his own interpretation of a turnip and apple slaw recipe in which he wanted to use up the bounty of turnips he'd gotten from our farmers market this past Saturday. Mindful that I also had some turnips to use up I asked for the recipe, which he shared, but that recipe also linked to another cabbage and turnip slaw recipe that had a buttermilk dressing.

The author of the buttermilk slaw recipe decried how heavy on the mayo many coleslaws are so she wanted a creamy dressing not laden with mayo. Hence her buttermilk slaw, which was a revelation to me! I think this is technically a ranch dressing, but it's not heavy at all, and is quite close to Ellie Krieger's take on the same riff, which would therefore make it Brian (my partner) approved. Frankly, I would make this dressing for any salad, not just coleslaw. I would even substitute yogurt, which we always have on hand, for the buttermilk, which I only had on hand so that I could make cornbread to serve at the women's shelter with the chili we made this past Monday. Since I have half a bottle of buttermilk still on hand, this dressing will be made again in the near future, along with some muffins or biscuits or something to use up the rest of that buttermilk (eating down the fridge as usual).

Brian howled when he saw me using mayo at all, even though mine is reduced fat. He started haranguing me about good fats and bad fats even though I was making the concession of low fat light mayo, which I normally wouldn't advocate but it has half the fat of regular mayo and a third of the fat of olive oil even. Those are my only arguments when he starts to balk at the thought of mayonnaise passing his lips. I should just buy the Hellman's Real, which at least has a recognizable list of ingredients!

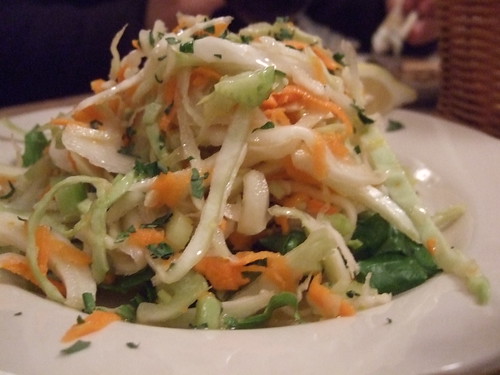
I also like to make coleslaw because it's a good excuse to pull out my food processor and use its slicing and shredding accessories. Of course all of that slicing and shredding could have been done by hand but I don't award points just for doing something by hand. Simplicity demands the use of the processor, plus you get a finer shred with your knuckles intact. Maybe I could have used my mandolin to get matchsticks of the turnips, but I just shredded those and sliced the carrots and radishes. Unfortunately I didn't photograph my slaw but linked is a picture borrowed from the web. Below is my take on this delicious coleslaw, Joy of Cooking style:


Coleslaw with "Creamy" Buttermilk Dressing


Serves 6 to 8

In a bowl large enough to mix the coleslaw, whisk together
1/2 cup of buttermilk
3 tablespoons of mayonnaise
2 tablespoons of cider vinegar and
1 teaspoon of honey [I omitted]
until smooth. Season to taste with
salt and pepper
and set aside.

Using a sharp knife, quarter and core a
2 pound head of cabbage.
Rinse and trim the the tops and bottoms of
5 to 8 radishes
4 to 6 turnips [hakurei recommended] and
2 large carrots.
Using the slicing disk of a food processor with a large work bowl, thinly slice the cabbage and radishes. Peel the carrots. Using the shredding disk, shred the turnips and carrots. [Note: empty the food processor bowl as needed so that the sliced and shredded contents do not push up on the disk possibly cause your processor to seize up in its cover, which happened to me once and rendered my processor inoperable. Miraculously, Kitchen-Aid replaced it for free!] Combine the vegetables with the dressing and sprinkle with
1 teaspoon celery seeds.
Mix thoroughly and garnish with your choice of fresh herbs such as chopped
parsley, chives, cilantro, tarragon, or dill.

Sunday, October 10, 2010

A Revisit to Summer's Quintessence: Tomato Tart with Corn, Basil, and Chevre


It was nearly a year ago that I blogged with profuse apologies about making a corn and tomato galette over the first weekend of November. I'd just discovered a blog with the full monty of beautiful food porn called Alexandra's Kitchen. Her photos are just so gorgeous that I just wanted to start making her recipes on the spot, they looked that delicious. While the result of my November undertaking was pretty damn good, I've been wanting to revisit the same recipe all summer long this year to atone for having made the dish in the fall when both tomatoes and corn were past their prime. This tart is for me the quintessence of summer's bounty, but I guess I'm just too busy going to the beach to actually make it in the summer!

Well, this past weekend was fall by the calendar yet sunny and warm during the day. And having bought on Saturday what is probably the last of the season's corn at the farmers market (this corn is not for eating off the cob but rather cooking in soups and in my favorite succotash that I will probably use as stuffing in some globe zucchini as a final good-bye to summer, but I digress) along with some pretty nice looking tomatoes, I knew Sunday morning had to be a revisit to this corn and tomato galette. (I know, late to the party again, but truth be told I was only able last year to make the galette in November because I'd bought corn and kept it past its prime in the fridge for two weeks! And while it was still good enough to cook and eat, this recipe deserves quality ingredients--and a nice side salad, and the warm sun on your cheek as you enjoy it with a bellini to capture the summer's best offerings.)

As per my usual of late in maintaining my ethos of "eating down the fridge," I was also inclined to make this recipe because I had two cheeses in my fridge I wanted to make good use of before they might go bad, in this case goat cheese and ricotta I'd purchased at the farmers market the previous week. Having made this recipe just once and blogged about the result, I'd thought that it had a layer of creme fraiche on its bottom that was then layered with sauteed corn and onion before being topped by the thick tomato slices. Only after I'd made the crust did I realize that my memory had failed me slightly in that I was combining the ingredients for Alexandra's quiche recipe, which has homemade creme fraiche, with the ingredients for the tomato galette, which has no cheese base but has lots of grated cheese either above or below the tomatoes. No worries! A quick whisk to combine the chevre and ricotta on hand with a dash or two of goat's milk and an egg, some dried thyme, and salt and pepper and I had a beautiful cheese bed upon which to lay my sauteed corn and onion and the sliced tomatoes.

Also, I keep referring to this recipe as a galette, i.e. a free form tart that is not baked in a special pan. The ingredients are laid in the middle of the rolled-out dough, leaving a two inch border that is then folded and pleated over the contents to form a rustic tart that is baked and sliced up almost like a thick piece of pizza. However, I wanted to make the dish in my rectangular tart pan which I'd bought for an asparagus recipe of Jamie Oliver's that is delicious but a bit too much work so I've only ever used the pan once before. Added bonus is that rolling the dough out into a rectangle vs. a circle is rather easy so getting the dough to fit into my tart pan was quite easy. Ironically, Alexandra's galette recipe was a redux of her original tart preparation, which she had first made in a round tart pan. What with the addition of my cheesy base layer, I guess I can call this recipe my own for my return trip, which I happily present below. Also, do yourself a favor and double the pastry recipe, which I foolishly did not do. I can guarantee that you'll want to make it again for this recipe or a quiche or even a peach pie!

Tomato Tart with Corn, Basil, and Chevre
Serves 4 to 6

Pastry recipe
Adapted from Alexandra Stafford's adaptation from Fine Cooking, August 2000
  • 1-1/4 cups (5 oz.) all-purpose flour
  • 1/3 cup (1-1/2 oz.) fine yellow cornmeal [I used masa harina as I tend to buy medium rather than fine corn meal]
  • 1 tsp. sugar
  • 1/2 tsp. salt
  • 6 T. (3 oz.) unsalted butter, cut into 1/2-inch pieces and chilled
  • 3 T. olive oil
  • 1/4 cup ice water
In a medium bowl, mix together the flour, cornmeal, sugar, and salt. Cut in the chilled butter using a stand mixer, a food processor, or a pastry blender until it’s evenly distributed but still in large, visible pieces. Add the olive oil and ice water a tablespoon at a time and mix until the dough begins to come together. It should still be separate crumbs mostly. Gather the dough with your hands and shape it into a disk. Wrap the disk in plastic and refrigerate for at least 1 hour. [Tip: It's best to make this dough the day before you need it because of the blind baking step which adds to the prep time. If impatient like me you can place the dough in the freezer for 20 minutes and then put in the fridge until ready to use.]

Filling
  • 1 large and 2 small to medium ripe tomatoes (about 1 pound total) cut into 1/3-inch slices, lightly salted and draining on paper towels as you go about preparing the onions and corn
  • 2 Tbs. olive oil
  • 1 large red onion, roughly chopped
  • Salt and freshly ground black pepper
  • Kernels from 2 ears of corn (generous 1 cup) [Tip: to cut corn off the cob without the kernels flying everywhere, hold the ear upright on your cutting board, but start cutting halfway down the ear, rotating to remove all the corn from one half of the ear; turn the ear over and repeat for the half you were holding. Voila! Corn on the cutting board (mostly) and not on your counter, plus your fingertips are well away from your knife blade!]
  • 2 cloves garlic, minced
  • 1/2 bunch basil coarsely chopped to yield about 1/2 cup
  • 8 oz. soft cheese such as goat cheese or ricotta
  • 2 -3 Tbs. milk
  • 2 tsp. chopped fresh thyme or 1 tsp. dried
  • 1 egg
  • salt and pepper to taste.
  • 1 recipe cornmeal pastry (see above)
  • 1/4 cup grated semi-hard or hard cheese, such as manchego or parmesan
  • Garnish of your choice: chopped parsley, chives, basil or scallion, optional
Adjust an oven rack to the center position and heat the oven to 375°F.
Prep the onions and corn: Heat the olive oil in a large sauté pan, over medium heat. Add the onion and cook, stirring frequently, until softened but not browned, about 10 min. Season with salt and pepper. Add the corn and cook another 3 minutes. Remove from the heat and mix in the garlic and chopped basil, letting the mixture cool in the pan.
Blind bake the tart shell: Meanwhile, if it's been long enough to firm up the dough, roll it out on a floured surface until big enough to fit your tart pan. Transfer the pastry to your tart pan and fit it into the sides without stretching. Trim off any excess and if necessary patch the dough where needed by moistening the edge with water and fitting the extra piece into the bare spot. Prick the bottom all over with a fork and lay a piece of parchment paper larger than the tart pan into the bottom. Fill the parchment paper with pie weights (I use about a pound of beans and rice reserved for this purpose) and bake in the oven for 10 minutes. After 10 minutes remove the parchment and pie weights to a bowl and let cool for use another day. Return the tart to the oven for another 10 minutes until it becomes golden brown. Let cool slightly. [Tart crust can be prepared a day in advance. Wrap the tart pan in plastic wrap once cool and store at room temperature.]
Prep the chevre base layer: Whisk together the goat cheese, egg, thyme, salt and pepper with 2 tablespoons of the milk until a smooth spreadable consistency. If too thick, add some milk a little bit at at a time until the mixture is spreadable like cake frosting. Spread the cheese mixture into the bottom of the slightly cooled tart crust using a rubber spatula or the back of a spoon. Layer the onion and corn mixture on top. Pat the tomato slices dry with a paper towel and arrange decoratively on top of the corn mixture. Fit the tomatoes snugly without overlapping as they will shrink as the tart bakes. Sprinkle or grate some parmesan or other cheese over the top of the tomatoes.
Bake and serve: Bake until the crust has browned and the tomatoes have roasted and shriveled slightly, 35 to 45 minutes. Remove from the oven and let cool for 10 minutes. Slice the tart and serve with the herb or scallion garnish of your choice (which I forgot to do as you see in the picture below cuz I was so eager to taste this bad boy).